Ideas
One Potato, One Shape, and a Pattern That Starts to Move
The first print may be patchy. The next can turn it into a rhythm. Make a small sheet of patterned paper and discover how repetition changes an ordinary shape.
By Hobby-ist Editorial Team · 5 min read · October 21, 2026
In this story
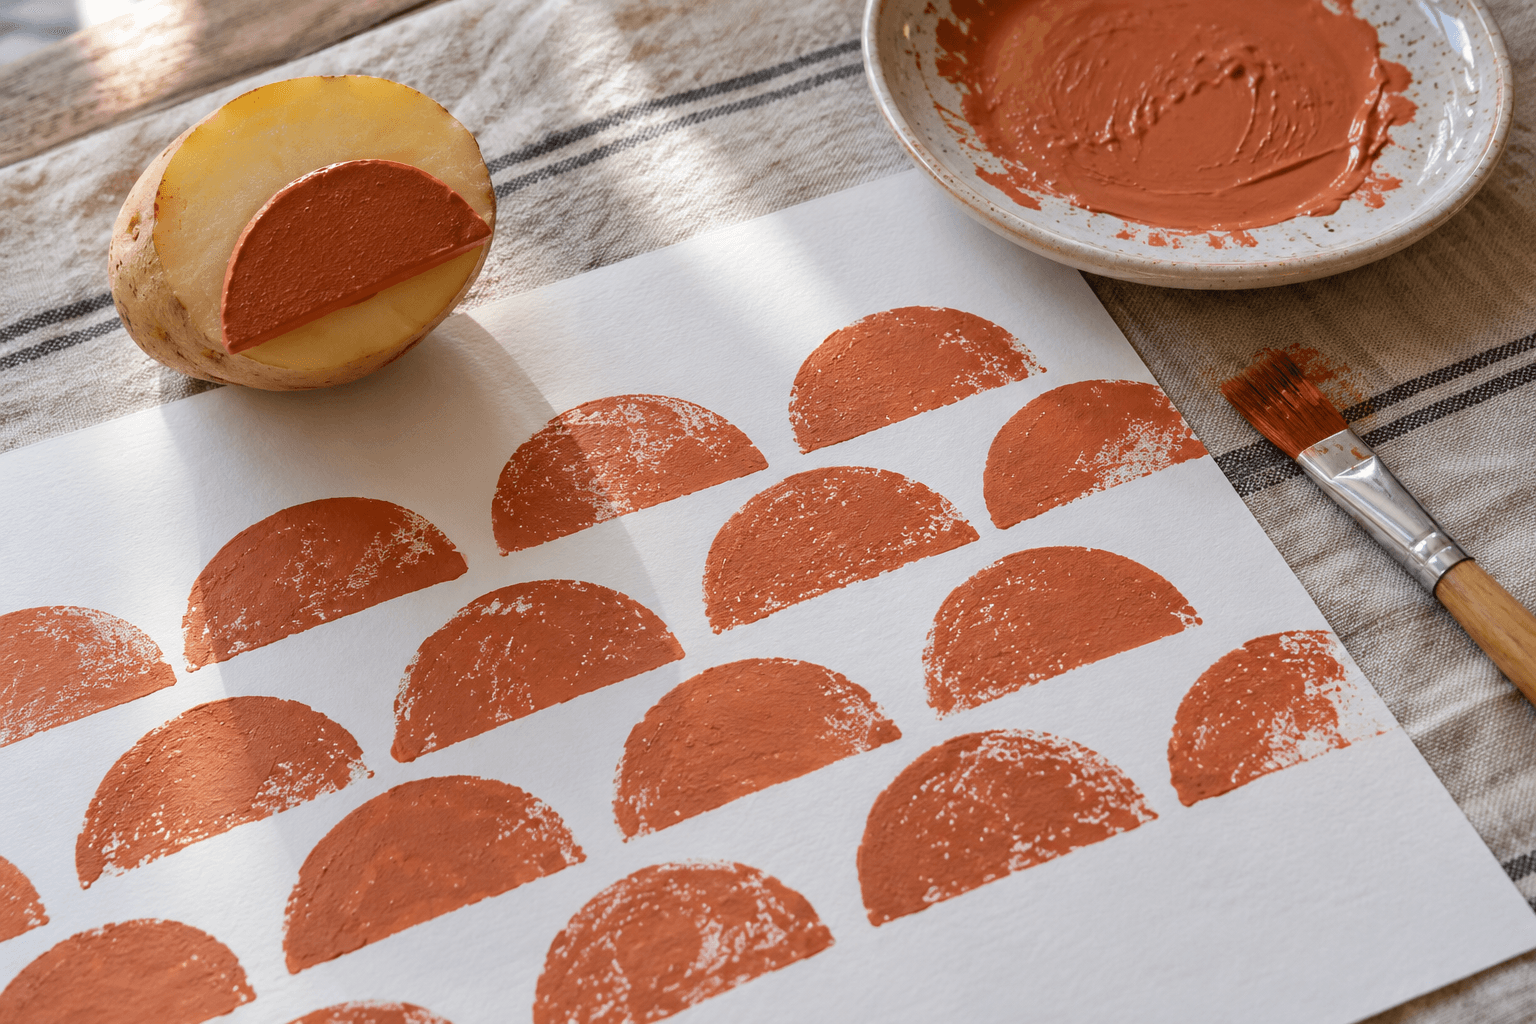
The first semicircle is a little pale at one edge. By itself it could look like a failed attempt at a perfect stamp. Put another beside it, turn the next one around, and something more interesting happens: the shapes start to relate. A mark becomes a pattern. The pleasure is in that change, and a potato is a forgiving way to try it without buying a carving kit.
This project makes one small sheet of printed paper for a card front, a book cover or simply a pattern you like. It works best for someone who enjoys a visible, slightly unpredictable result. If you want fine lettering or a precisely identical commercial repeat, a soft potato is likely to frustrate you. Here we are choosing a broad shape and letting the handmade variations remain part of it.
Begin with the print, not an ambitious carving
Choose a fresh, firm potato, plain scrap paper, a final sheet of paper or thin card, a small flat brush, a shallow paint dish and a protected work surface. Water-based craft paint or washable poster paint is enough for paper. Keep a cloth and water nearby. This is a paper project; washable paint on fabric will not automatically become permanent through drying or ironing.
An adult should cut a stable, flat face across the potato on a cutting board and prepare any relief shape. For a first attempt, keep a simple raised semicircle or broad rectangle and remove only the surrounding area. The part that remains highest receives paint and prints. Keep cutting tools out of a child’s stamping area; making a safe stamp and using it are separate jobs.
Do not begin with tiny lines, letters or a star full of narrow points. A broad shape is easier to coat and press evenly. It also makes a layout decision visible: a semicircle facing upward is different from one facing down. That gives you several patterns from one stamp, without asking the carving to do all the design work.
Blot surface moisture gently before applying paint. A wet face can change how the paint sits, while pressing a puddle of paint into the dish tends to coat areas you did not mean to print. Brush a thin, even film onto the raised shape instead. The goal is a coated surface with its form still visible, not a mound that squashes outward.
Make a little test strip you can actually learn from
On scrap paper, make three prints. Coat the stamp and press it straight down for the first. Make a second without adding paint, then coat again for a third. Lift vertically each time. This comparison shows more than repeatedly repainting an unclear mark: the second impression may reveal whether the original coating was too thick, while a fresh third tests whether your pressure is becoming more even.
If the outline spreads into a thick rim, reduce paint before pressing harder. If the middle prints but one edge does not, check that the face is flat and that you are pressing across it evenly. A rocking motion may fill an edge, but it can also make a double outline. Try a straight press with the other hand supporting the paper rather than moving it.
If all prints are pale and broken, add a little paint to a freshly blotted stamp. If the shape begins crisp and then becomes gummy, stop and clear the buildup before continuing. Change one thing at a time. A stamp that is wet, newly cut and overloaded with paint cannot tell you which of those changes helped.
Keep the test strip beside you as a reminder of the amount you preferred. It need not become a formal record. It is simply easier to recognize a good coating when you can compare it with the mark it made.
The space between shapes does half the work
Before filling the final sheet, choose between a regular row and a staggered row. In a regular row, imagine the shapes sitting on the same baseline with similar gaps. In a staggered layout, begin the second row halfway between the first row’s positions. The same stamp can begin to suggest a moving surface instead of separate icons.
Use a light pencil guide if it helps, but avoid drawing a heavy grid you will later struggle to hide. You can also place small guide marks along the margins and align by eye. Work in a direction that keeps your hand away from wet paint. Let the first row establish a spacing you can continue comfortably rather than squeezing a final shape into the edge.
Our suggested comparison is one strip of semicircles facing the same way and another with alternate rows turned upside down. Nothing about the carved shape has changed. What changes is the relationship: openings face each other, empty areas join, and your eye begins to follow a repeated interval. That is the part worth looking for before adding another color or carving another stamp.
A mistake can become a choice, but it does not have to
A smudge in the middle may invite a small accent somewhere else. It may also be a smudge you would rather cut away. Handmade work does not require you to declare every accident wonderful. Decide whether the mark supports the pattern, then either continue it deliberately or trim the finished paper into a smaller useful piece.
For example, a row that drifts upward could become the edge of a card rather than the center of a full wrapping sheet. A pale section might work as a quieter place for a label. Make those decisions after the paper has dried so you do not drag wet paint into a second problem. The useful question is what the sheet can become now, not whether it matches the first picture in your head.
Use prepared potatoes the same day, keep them out of food preparation afterward and discard them when finished. Wash paint from tools promptly according to the paint’s instructions. Let the paper dry before stacking or folding; a dry-looking surface may still transfer under pressure.
The V&A’s introduction to carved printing blocks offers a fascinating next step in seeing how a repeated image begins with a physical surface. For another way to reveal texture, try our leaf-rubbing project. If the paper wants to become a small publication, the eight-page zine guide gives it a different destination.
You may finish with a card, or with a sheet you keep because the gaps feel right. Either way, the interesting moment was not necessarily the cleanest impression. It was when the next shape made the first one look different.
Sources & verification
Information checked: 2026-10-21