Getting Started
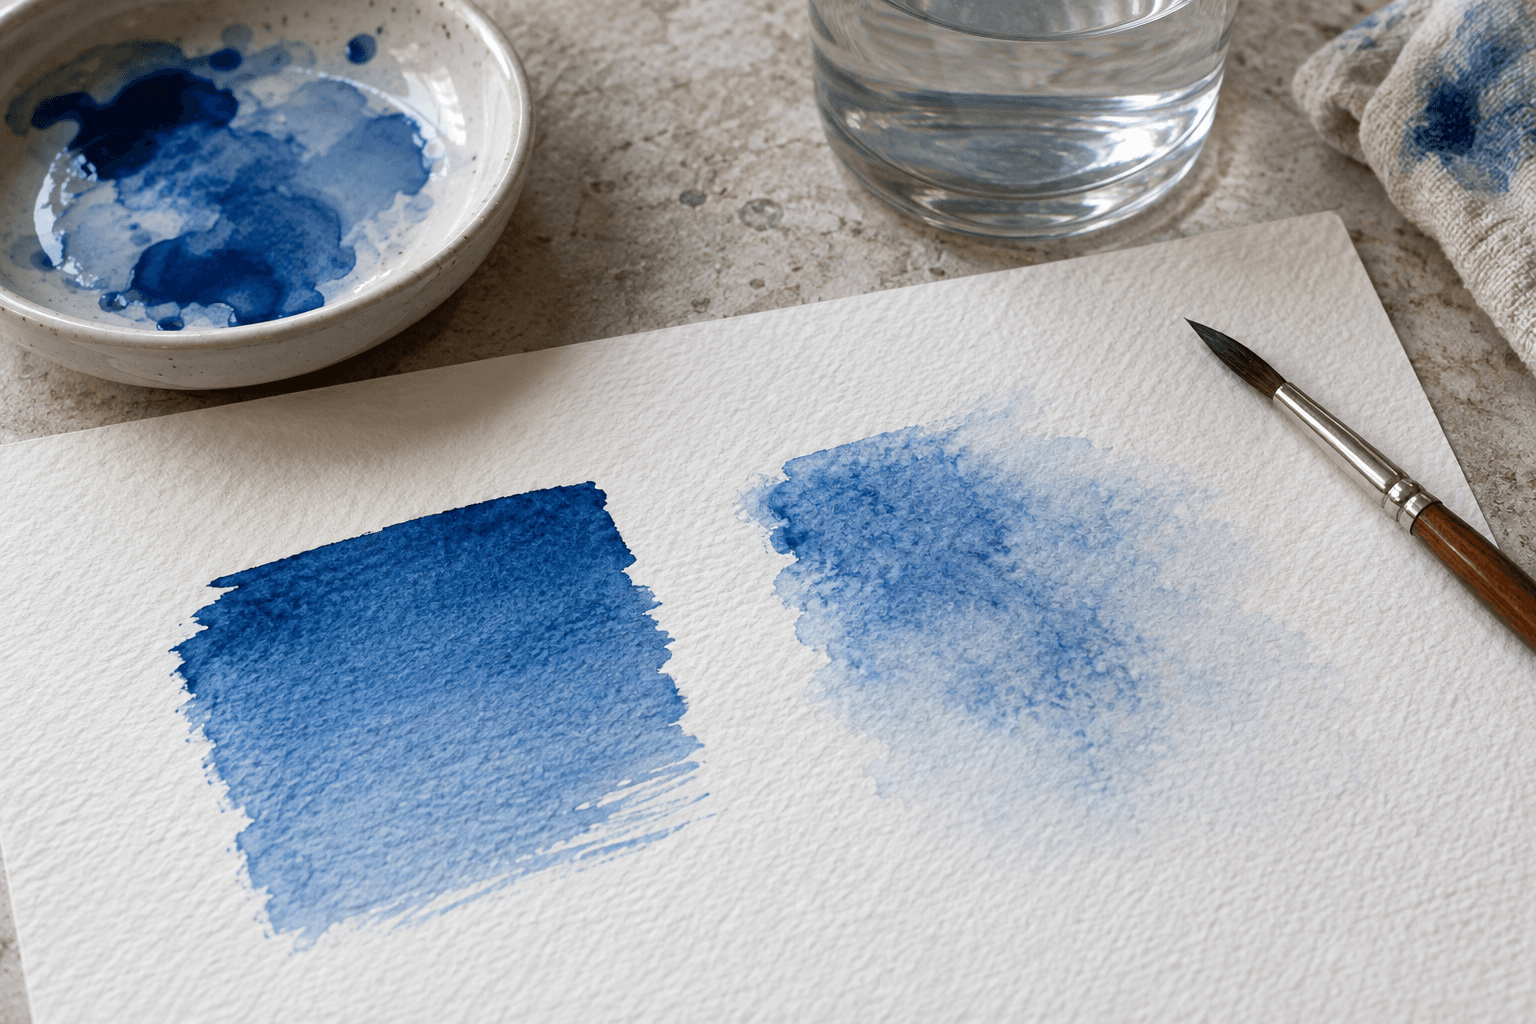
Before Your First Watercolor Landscape, Make Two Blue Patches
A spreading edge can feel like a mistake until you see what the water is doing. Try one color on dry and damp paper, then use the difference to make a small painting of your own.
By Hobby-ist Editorial Team · 4 min read · October 9, 2026
In this story
The brush leaves a blue mark. You intend it to stay where you put it. Instead the edge softens and the color travels. Your first thought may be that you have already done something wrong.
Before deciding that watercolor is difficult, give that moving edge a smaller job. Two blue patches can show you something a finished landscape tutorial may rush past: the paper and water are part of the mark. A crisp edge and a soft one can both belong in a painting.
The page matters before the paint set
Start with paper made for watercolor. Winsor & Newton’s paper guide explains that the surface is designed to absorb water; it distinguishes smooth hot-press paper from textured cold-press paper. For this first comparison, the useful purchase is a few suitable sheets, not a drawer of colors.
An ordinary thin notebook can make a first session harder to interpret. If the surface ripples or becomes fragile, you may be judging the paper as though it were your skill. Suitable paper is not a promise of a perfectly flat sheet under any amount of water, but it gives the exercise a more sensible starting point.
Use one watercolor color, a brush suited to watercolor, a mixing surface, water and a cloth or paper towel. Blue makes the example easy to describe; use a color you already own. Two small areas on one sheet are enough. You do not need an expensive cotton block or a large brush collection to discover whether this kind of painting interests you.
One patch on dry paper
Mix a small amount of paint with water on the palette. On an untouched dry part of the sheet, lay down a modest patch in a few strokes. Leave it alone. Look at where the edge holds its shape and where a brush stroke becomes visible. You are making a sample, not filling a page evenly for a grade.
If the brush feels almost dry and skips across the surface, add a little water to the mixture and try beside the first mark. If you leave a large puddle, use less liquid for the next patch. Change the next mark rather than repeatedly scrubbing the first one. A series of small tries is easier to read than one area repaired until you can no longer remember how it began.
One patch on damp paper
Wet another small area with clean water. Aim for a light sheen rather than standing puddles, then introduce your mixed color. Winsor & Newton’s wet-on-wet guidance uses wet or damp paper to produce soft washes. Here, simply watch the boundary. How far does the color travel? Does it soften in every direction or remain clearer in one part?
Do not add more water just because the result is slower than an online demonstration. Different papers, paints and room conditions can make the experience different. If you cannot distinguish the two patches, try the damp one again with less surface water, leaving a fresh dry area as a comparison. Avoid turning this into a universal recipe measured in seconds.
Wait before deciding what you made
Let both samples dry before comparing them. Hold off on drawing over them or adding another layer while they are still damp. The manufacturer’s Sargent-inspired demonstration includes drying before a further coat; waiting is a practical part of building a painting, not empty time between the interesting steps.
Describe the result in ordinary words: a defined corner, a feathered edge, a darker rim, a patch that spread farther than expected. Then ask where that effect might be useful. A clear mark could suggest a small object; a soft area might suggest distant color or a background. These are possibilities, not rules that every subject must obey.
Give the two edges a small subject
For an imagined first painting, try a blue mug in front of a soft blue background. Keep the background in one small damp area and allow it to dry. Then place the mug shape on dry paper. Leave a strip of bare paper between elements if that makes the task easier. You are not required to achieve a realistic mug, reflections or a perfect ellipse on the first try.
The important choice is where you want the viewer to notice a boundary. Let one part remain quieter. Stop before adding details merely because the page looks unfinished. A simple image can feel complete because its main idea is clear, even if you have not used every color in the set.
Choose a first session you would repeat
If you prefer a line that stays put, our first sketching kit may be a more comfortable starting point. If you enjoy collecting surfaces and shapes, a three-scrap journal offers another kind of small paper project. Watercolor suits someone interested in responding to a material as well as directing it.
Hobby-ist’s judgment: spend the first session understanding a few marks before asking yourself for a finished scene. Keep a patch you like, even if it is not the one you intended. The moment watercolor starts to feel inviting may be the moment you can say, “I would like that edge in another picture.”
Sources & verification
Information checked: 2026-10-09