Ideas
Your First Halloween Pumpkin: Easy Carving and Painting Ideas
One pumpkin, a little table space and a design you want to make. Choose painting or carving, then plan an afternoon that includes the cleanup.
By Hobby-ist Editorial Team · 6 min read · October 3, 2026
In this story
Picture an afternoon across the table from a friend, each of you finding a different face in a pumpkin. One gets tiny eyes; the other gets an oversized grin. A task that began with “Where do I start?” turns into a conversation about what to name the finished characters.
Pumpkin decorating can be that kind of seasonal hobby: a small project with a visible finish, without a workshop or a long shopping list. Your first goal does not have to be a Halloween-ready house. Start with one pumpkin, a protected patch of table and a design you actually want to make.
Choose the process first: painting or carving?
Painting and carving offer different kinds of afternoons. Painting is about choosing colors and repeating marks. Carving includes scooping out the pumpkin and cutting openings that become a face when lit. Deciding which process appeals to you will help keep the supply list short.
- Choose painting if you want to work with dots, stripes or color without cutting. You will not need to empty the pumpkin, but you will need somewhere to leave wet paint undisturbed.
- Choose carving if you want a jack-o’-lantern with light shining through its features. Allow space for a stable work surface, suitable tools, scooping and cleanup.
If you are starting early in October, our suggestion is to paint now and save a carved pumpkin intended for Halloween night until closer to the date. Kansas State University notes that carved pumpkins may show noticeable rot within just a few days to a week. Do not plan on an early-October carving looking unchanged on October 31. Read the university’s storage guidance.
Build a small kit around one design
Choose the project before buying a basket of supplies. Check what you already have, then add only the tools for your chosen method.
- For either method: one manageable pumpkin, protective paper or a reusable table mat, a wiping cloth, and paper and a pencil for planning.
- For painting: a couple of craft-paint colors suitable for the pumpkin surface, brushes, a palette and a water container. Check the product’s surface and drying instructions.
- For carving: purpose-made pumpkin-carving tools, a sturdy spoon or scoop, a bowl for the contents and a battery-powered LED tea light.
Before committing to a pumpkin, see whether it sits securely on a flat surface. Decide which side will face forward. An off-center stem or uneven contour can help you choose a character rather than becoming something you have to hide.
Test your paint on a small patch before covering a large area. Different products behave differently: Crayola recommends testing, allowing extra drying time and keeping painted pumpkins indoors because some water-based products can run when exposed to moisture. It also says pumpkins decorated with its art materials are not intended for eating. Check the manufacturer’s pumpkin-painting advice.
Three designs to make your own
1. Dots with breathing room
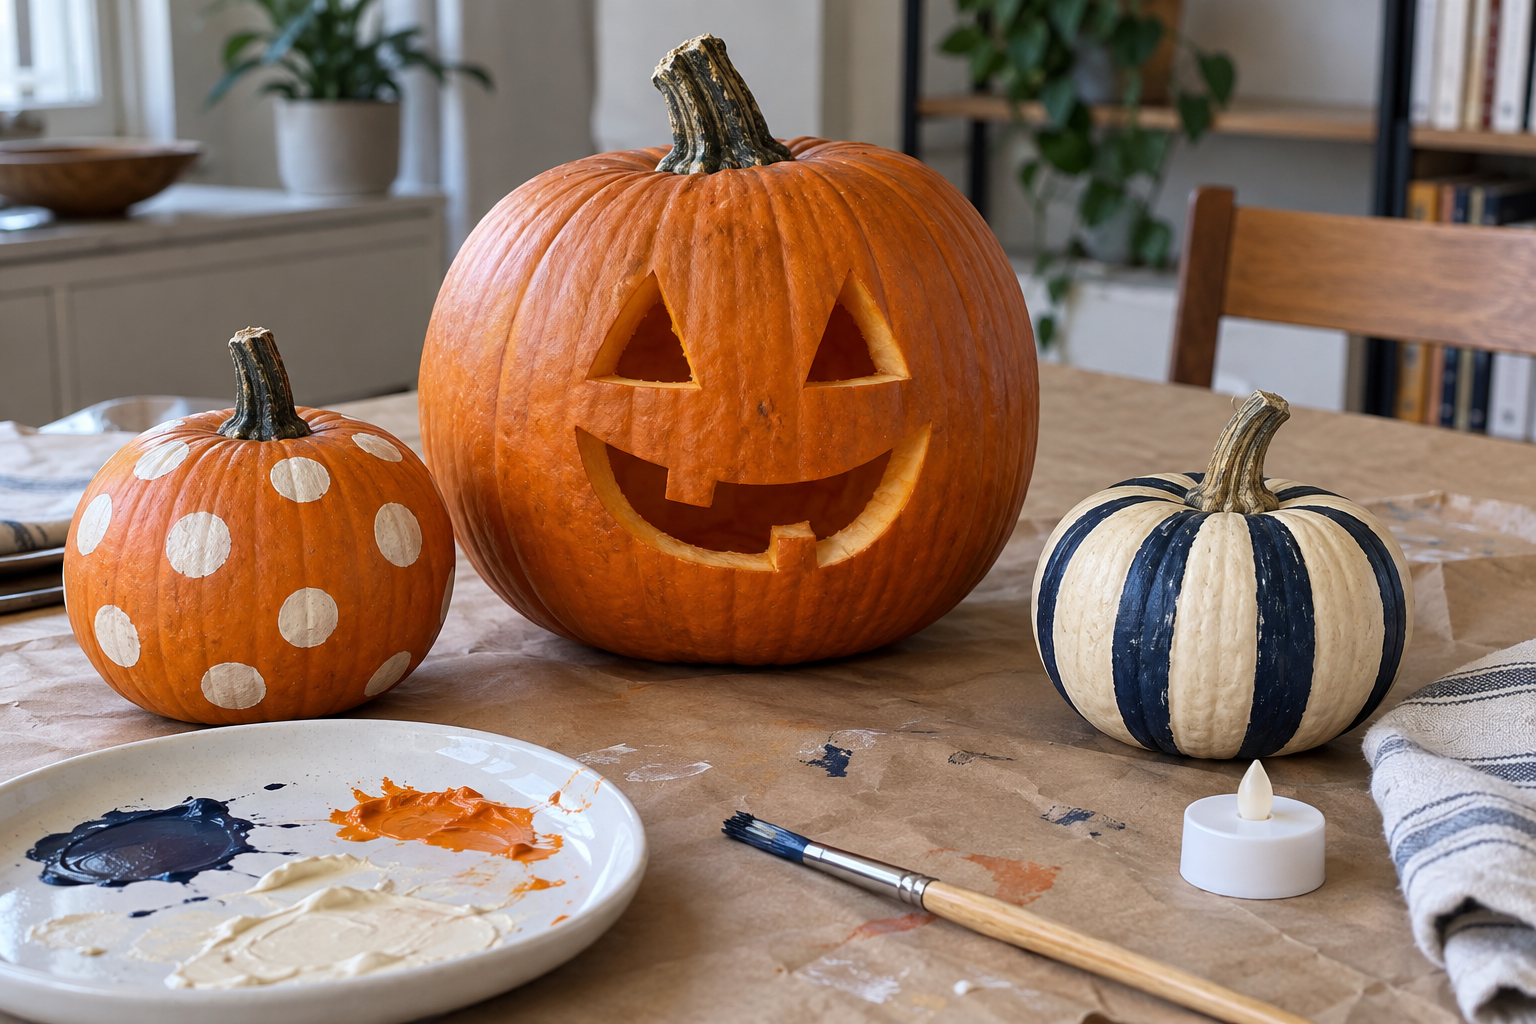
Leave an orange pumpkin’s natural color showing and add dots in one contrasting color, such as cream. Practice a few large and small dots on paper, then space them across the front. The idea is to leave room between the marks, rather than filling every gap.
Paint the side you can reach comfortably. Let it dry sufficiently before turning the pumpkin so wet dots do not touch your hand or the table. If a circle becomes a little oval, you can leave it. The design does not need every mark to match.
2. Wide stripes that follow the ribs
On a pale pumpkin, try a few broad vertical stripes in dark blue or black. Let the pumpkin’s grooves guide the brush instead of trying to transfer ruler-straight lines. Begin with two or three stripes at the front, then step back before deciding whether to add more.
Varying the width or spacing can become part of the pattern. Follow the paint’s drying instructions before touching up thin areas; plan a pause rather than repeatedly working the same wet patch. You can stop while plenty of the original pumpkin is still visible.
3. A jack-o’-lantern with one big expression
For a first carving, sketch two triangle eyes and a broad, uncomplicated mouth. Save fine teeth and lettering for another project. Leave generous areas of intact rind between the features rather than connecting them with fragile slivers.
Hold your paper sketch against the pumpkin to check its scale before transferring it. Wash and dry the pumpkin, then follow your carving tool’s instructions to open it and remove the seeds and loose strings. Work on a stable surface in manageable sections, keep your other hand out of the cutting path and stop to reposition if a tool catches. Do not force it. If cutting feels uncomfortable, paint the same face instead.
Finish by trying a battery-powered LED light inside. Utah State University recommends an electric light as an alternative to a candle. Read its jack-o’-lantern care guidance.
Give the afternoon a beginning and an ending
Decide where the finished pumpkin will go before you begin. Needing the dining table back while the paint is still wet can turn a relaxed activity into a rush. Prepare a protected resting spot where the pumpkin will not touch other objects.
- Set up: cover the table and bring out only the supplies for your chosen method. Keep drinks away from paint-water containers.
- Choose: sketch two possibilities and pick one. Once you have a direction, close the inspiration search for a while.
- Make: test a small painted area or work through the carving at a controlled pace. Pause once to look at the whole pumpkin from a little farther away.
- Finish: clean brushes and tools according to their instructions and move the pumpkin to its prepared spot. Treat drying time as separate from making time.
With friends, share a small constraint instead of requiring identical results: two paint colors, perhaps, or a face made only from eyes and a mouth. Before improving someone else’s design, ask what expression they are aiming for. Comparing the choices can be the best part of the afternoon.
Care for it without expecting it to last forever
A real pumpkin is a temporary craft material. Keep it cool and out of direct sun, and check its condition. Carved pumpkins deteriorate at different rates depending on their surroundings; a fixed lifespan is not a promise. Stop displaying one that is collapsing or visibly moldy, and use a protective tray underneath. Kansas State University explains the storage considerations.
Treat a painted or embellished pumpkin as a decoration, separate from food ingredients. When disposing of it, remove lights, batteries and added decorations and check your local waste rules. Do not assume a painted pumpkin belongs in food-scrap or compost collection.
Give your first pumpkin a name
Take one picture beside the original sketch, not just a photograph of the best-looking angle. Seeing what changed can tell you more than comparing your pumpkin with somebody else’s finished project. Write one sentence about what you enjoyed: making broad brushstrokes, changing the smile, or simply sharing the table.
You do not have to turn this into a weekly commitment. Wanting to make another pumpkin next October is a perfectly good reason to keep the photo. For this weekend, choose one design and clear a place for it. A seasonal hobby can begin with something that small.
Sources & verification
Information checked: 2026-10-03