Getting Started
Why Is My Crochet Getting Wider? Check the Edge Before Changing Your Hook
A growing stitch count and a looser row need different fixes. Count one completed row, identify the first and last stitches, and let that evidence guide your next move.
By Hobby-ist Editorial Team · 4 min read · October 16, 2026
In this story
If a plain crochet rectangle keeps getting wider, count the stitches in several completed rows. A rising count suggests added stitches—often near the row ends or a turning chain. If the count stays constant, compare stitch size, tension and the foundation instead of removing stitches at random.
The frustrating part is that each individual stitch may look reasonable. The widening only becomes obvious once several rows have accumulated. That makes the edge a better place to investigate than your general ability. You need a small set of observations, not a new collection of hooks.
Check what the pattern is asking for
First confirm that the section is supposed to be straight. Shaping, increases and decorative repeats can intentionally change a stitch count. Also check whether the pattern uses US or UK terminology: this article’s practice example uses US single crochet, called double crochet in UK terms. Follow the pattern’s own notes when they differ from a general tutorial.
On a plain section, count the completed row before making the next turning chain. Count the actual stitches, not the loop currently on the hook. Write the total down. Compare a few rows if you can identify them clearly; the first place where the total changes is more useful than the widest edge at the top.
Give the first and last stitches a marker
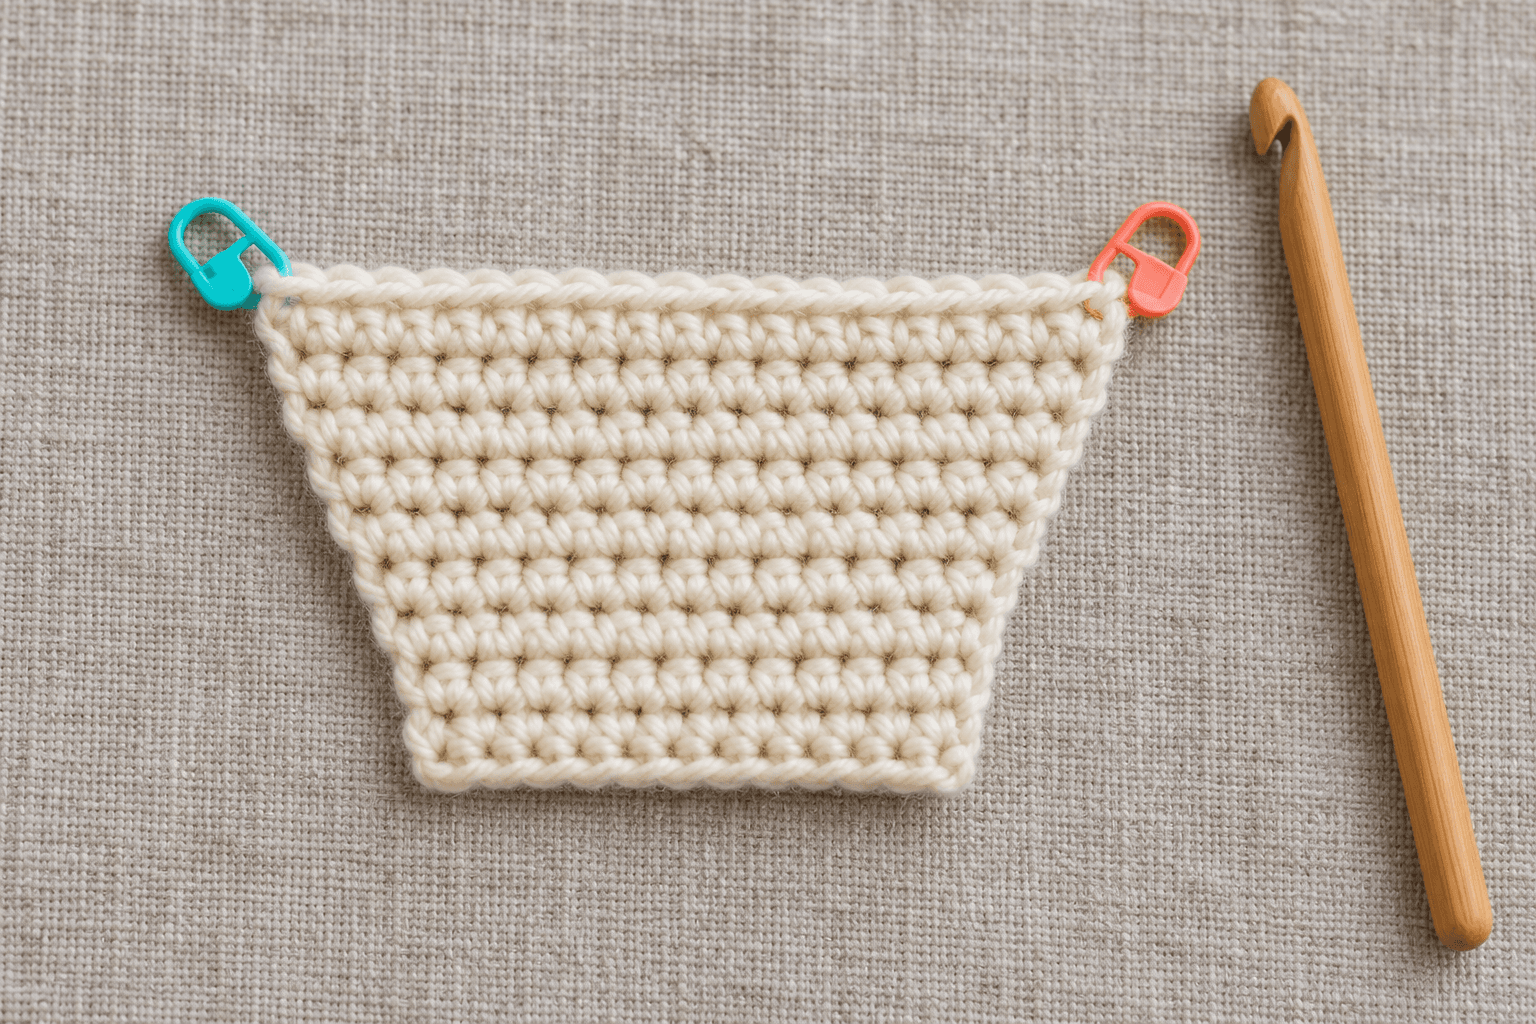
Put removable markers into the first and last actual stitches of a row so you can find them on the return pass. Move them as each new row is formed. Near the end, pause and identify exactly what you are about to work into rather than adding one more stitch simply because there seems to be a gap.
Lion Brand’s turning-chain guide explains that a single-crochet turning chain normally does not count as a stitch, while other stitches commonly use a different convention. Pattern instructions take priority. Accidentally treating both a counted turning chain and an added first stitch as separate intended positions can increase the row.
Do not apply “always skip the first stitch” as a universal repair. In a US single-crochet row where the turning chain does not count, that advice could create a new problem by losing a real stitch. Identify the rule you are using, then keep it consistent at both ends.
Try a small rectangle before unpicking the large one
For a simple US single-crochet practice sample, chain 13, then work one single crochet into the second chain from the hook and each remaining chain: 12 stitches. Chain one and turn. With that chain not counted as a stitch, work into each of the 12 actual stitches, then stop. Mark the first and last stitches and repeat a few rows, counting 12 each time.
This is a deliberately small exercise, not a replacement for every project’s instructions. Use yarn and a hook that let you see the stitches easily. The aim is to recognize the row boundary while there are only a few decisions to make. A textured or fuzzy yarn can wait until you can identify that boundary reliably.
Increasing means adding stitches. Once you can see how it happens on purpose, an accidental increase becomes easier to notice. If the little sample stays steady, return to your larger project with the same counting and marker habit.
What if the count is correct?
If the same number of stitches occupies more width, look at the size of those stitches. Has your grip relaxed? Did you change hooks, yarn or stitch type? Is the foundation much tighter than the later fabric? Compare a small area laid flat without stretching it, and keep the setup stable while you test one change.
Blocking may improve the appearance of some suitable fibers and patterns, but it does not remove extra stitches. Do not stretch a mistaken rectangle until it looks square and assume the count problem has disappeared. Follow the yarn’s care instructions and the project’s finishing method.
Repair the first cause you can identify
For an important straight-edged project, you may need to undo work back to the first incorrect row. Mark that point and take a photo before unpicking so you know what you are trying to change. If finding the edge is still difficult, show a teacher the current row and the pattern’s turning-chain note; those are useful clues.
Our air-dry clay troubleshooting guide uses the same idea of a small comparison before remaking a large piece. For another quiet handwork project, our one-leaf embroidery journal keeps the first session deliberately manageable.
A straight edge begins with knowing where the row ends. Once you can see that, the next stitch becomes a choice again.
Sources & verification
Information checked: 2026-10-16